

Hugo on Github: #
I have been running my blog page locally on Kubernetes for a long time now. And it has worked very well. But one always have to try something new, and I have always wanted to explore the option to host it on Github to have one maintenance task less to worry about.
To get started with this I got some absolutely great help from my colleague Robert who put me into the right track to get this project rolling.
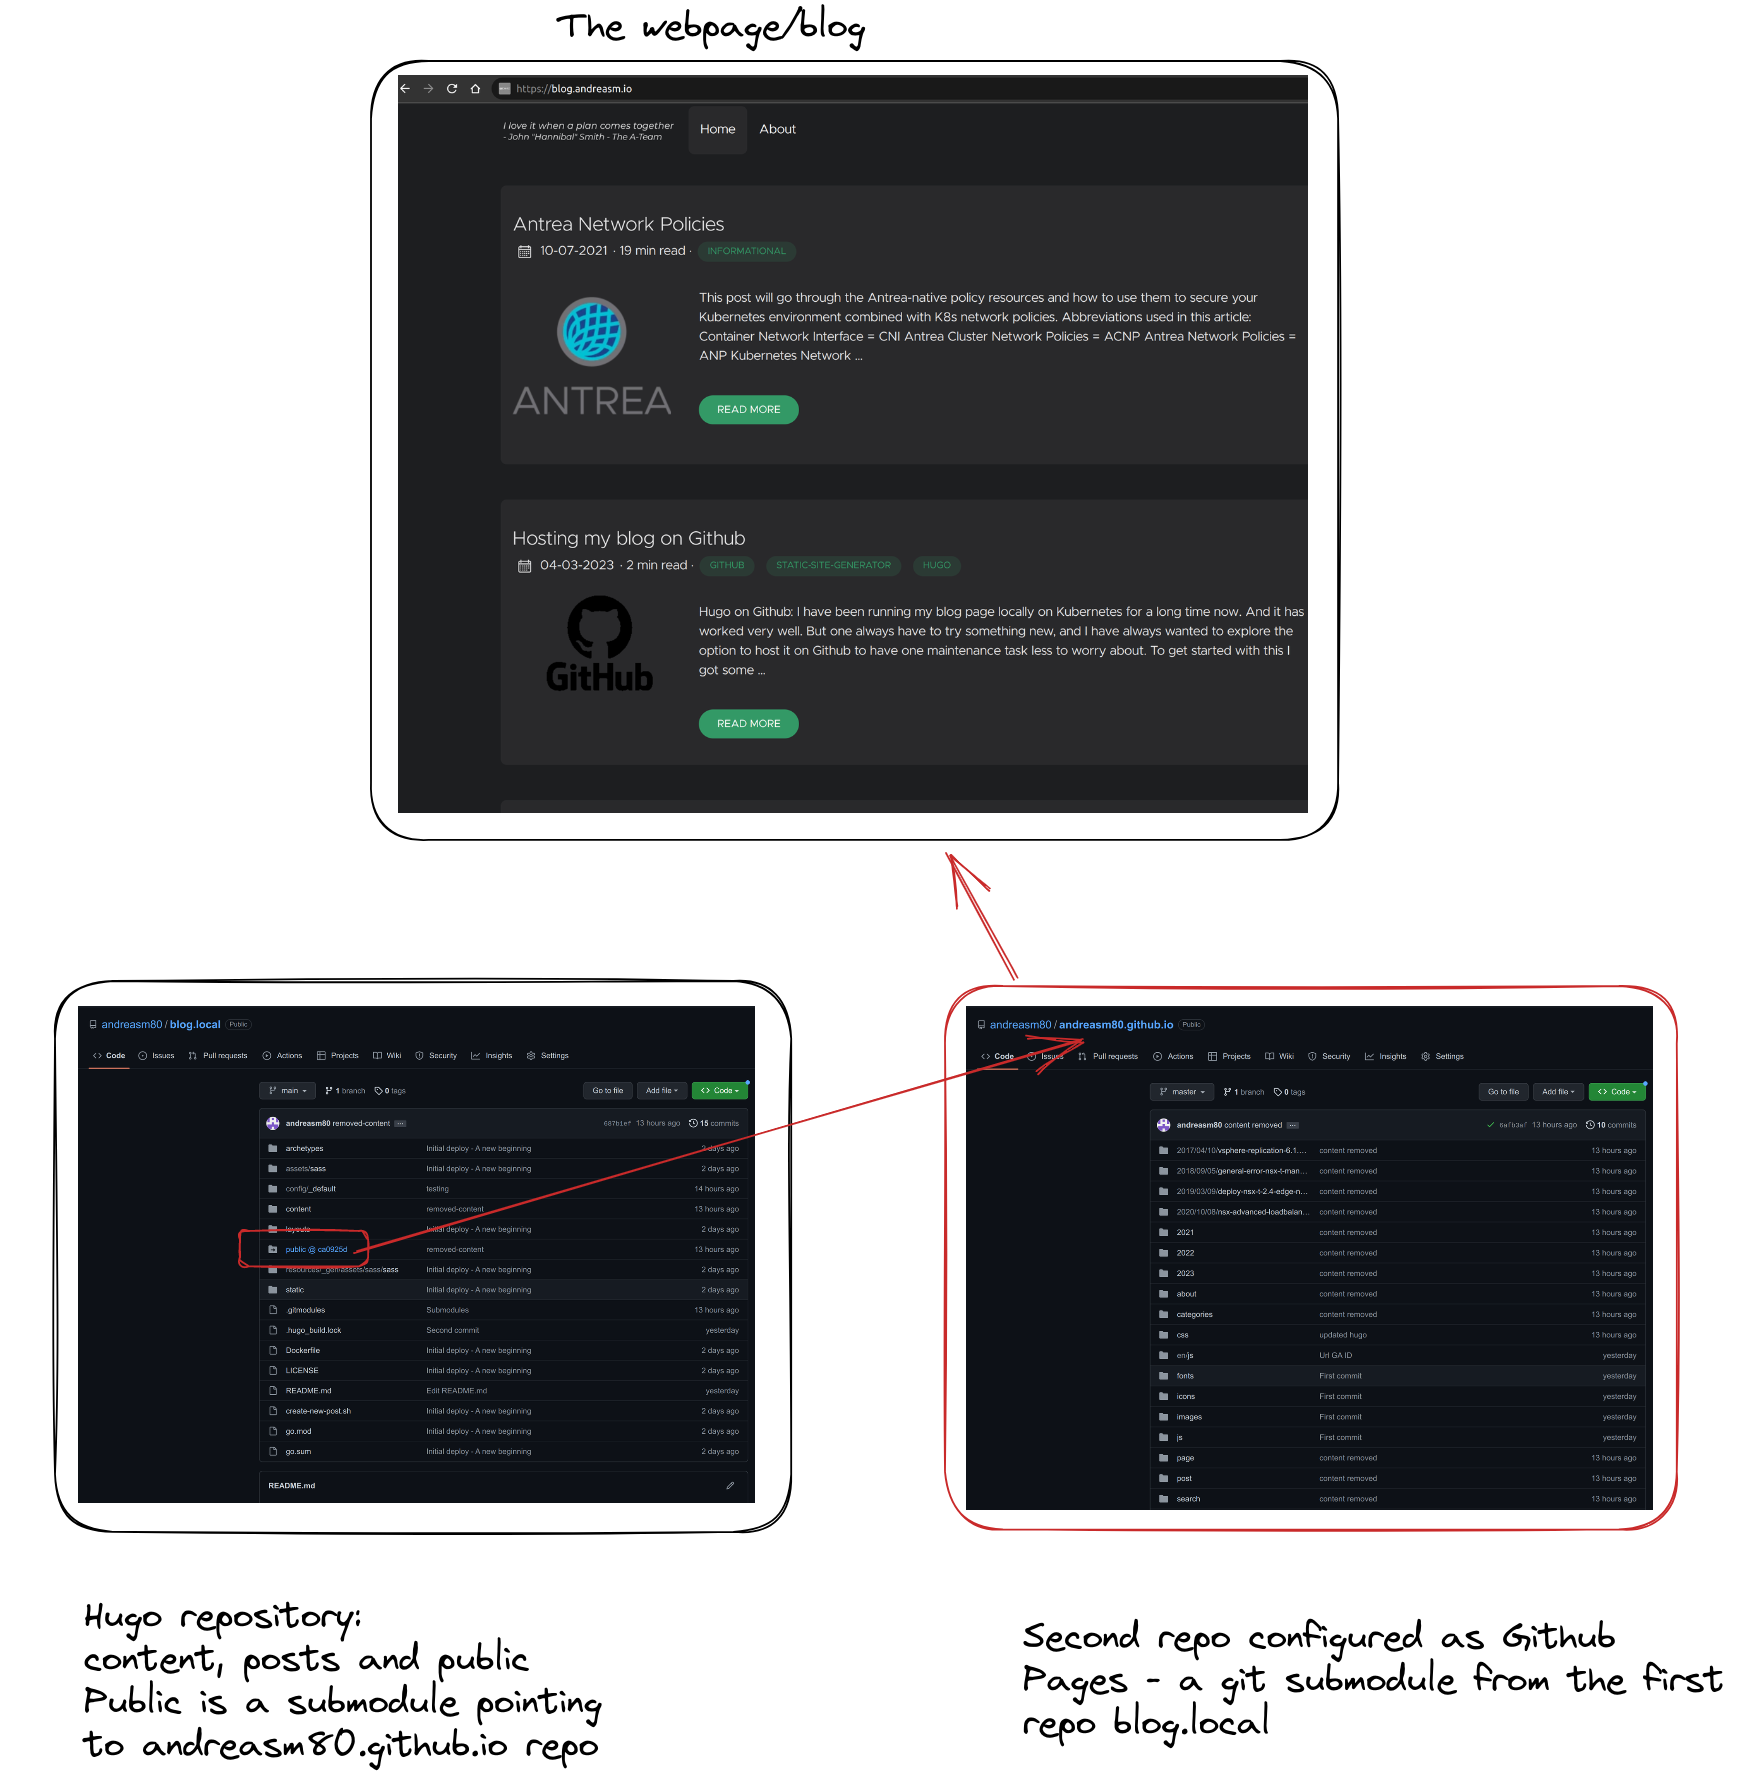
In short this post will cover how I did it (with the help from Robert). The moving parts used in this post is Github, Github Pages, Hugo, git, git submodules, a DNS record for my custom domain name and a Linux terminal with git installed. In Github we will end up with two repositories, one for the Hugo files themselves, and one which will be used our Github Page (the actual webpage of your blog). The goal is to be able to add content and update your blog with just a few commands and it is live.
Preparations in Github #
In my Github account I create two repositories, one for the “Hugo” contents itself (config, themes, contents etc) and one repository which will host the actual Github page itself. Lets dive into the details 😄
If not already a Github user, head over to Github.com and create yourself a user account. When logged into your Github account, create two repositories:
One repository is where you have all your Hugo files, content, posts, pages, config folders, css, archetypes and public folder when generating your pages. This repository is created like this in Github:
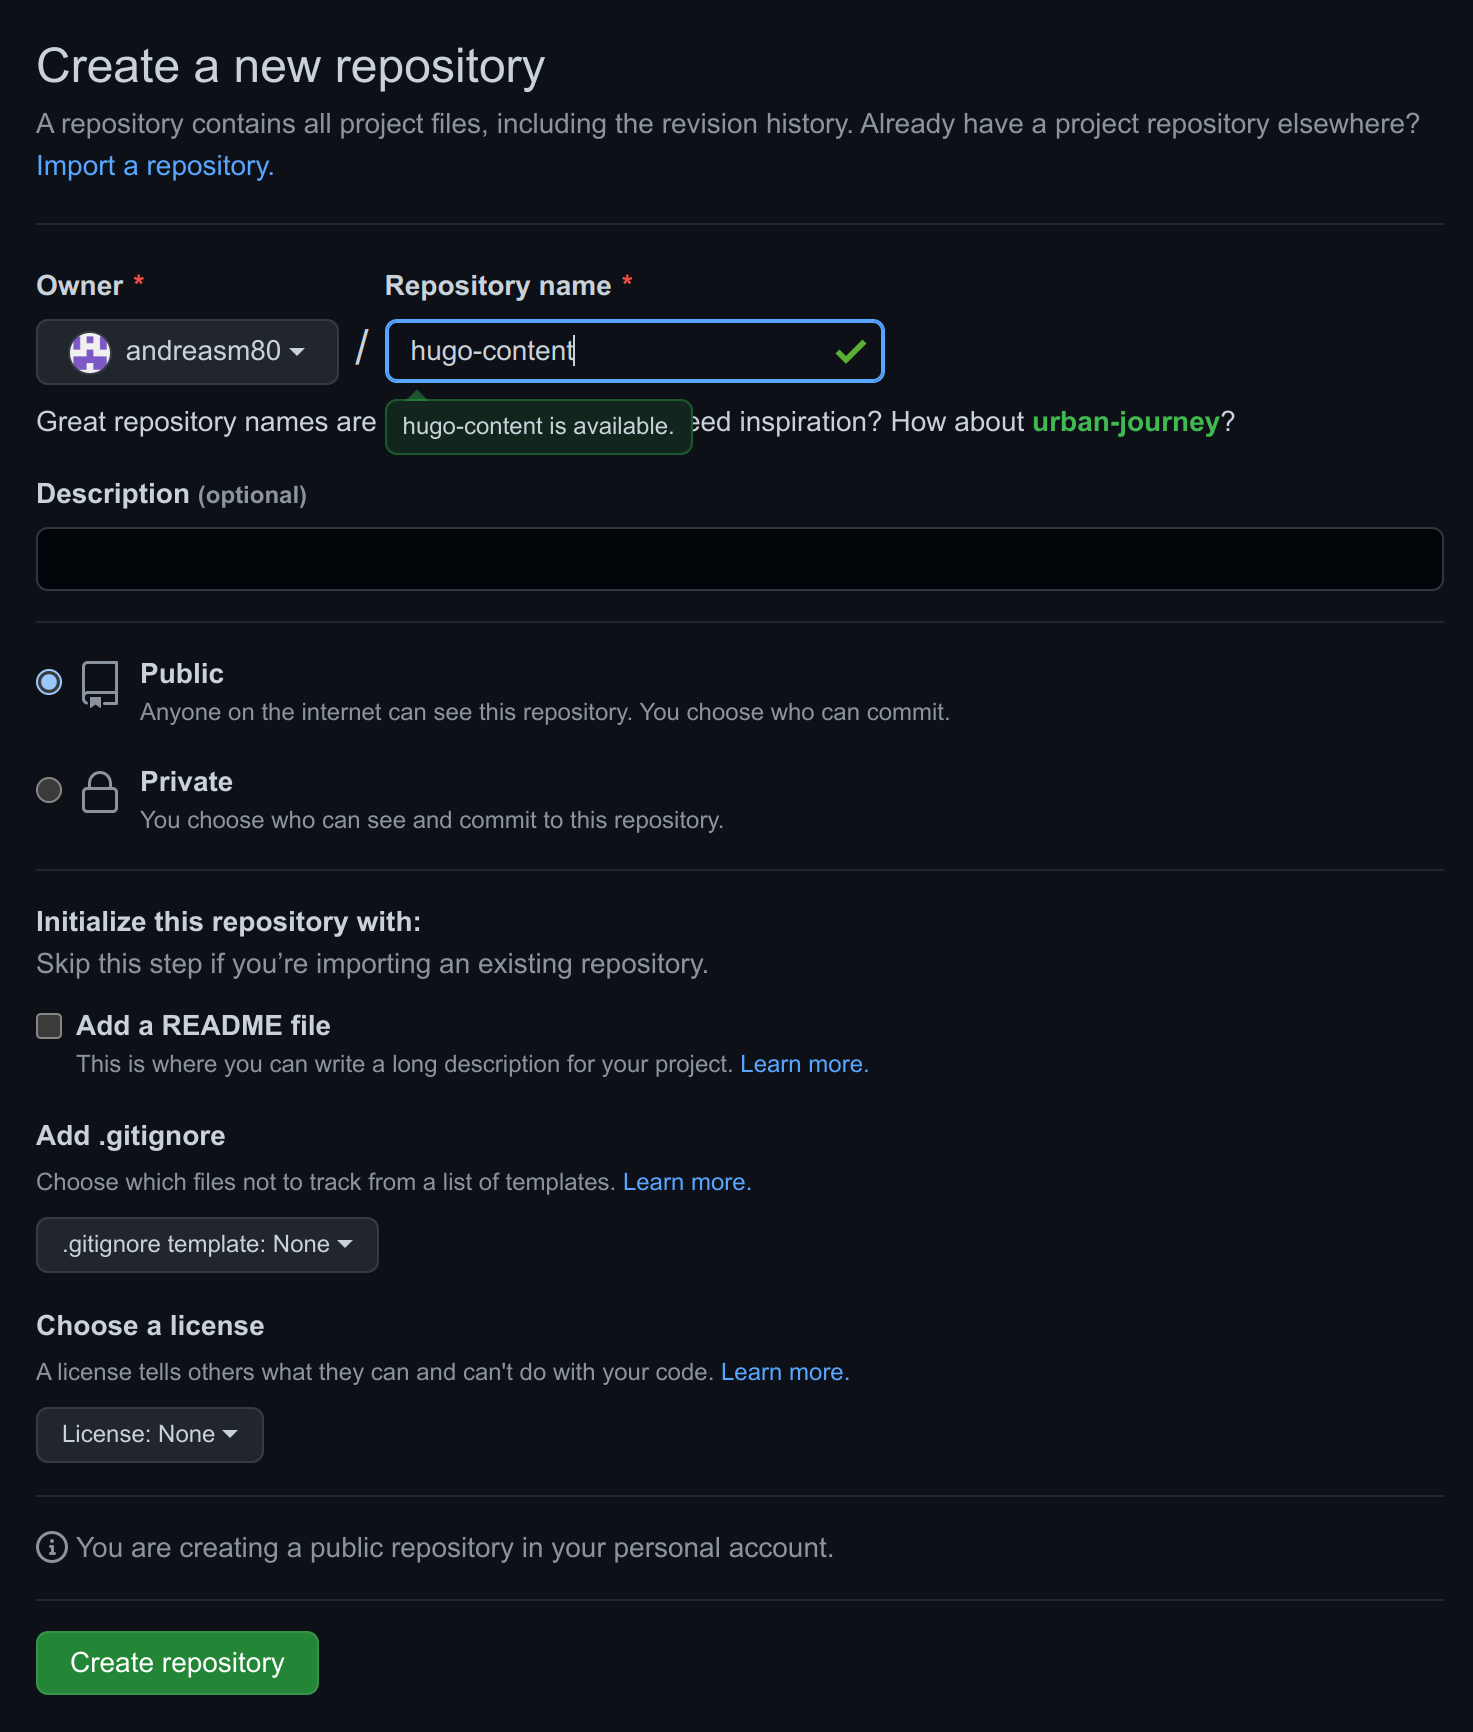
As this is a free Github account the only option is a Public repository.
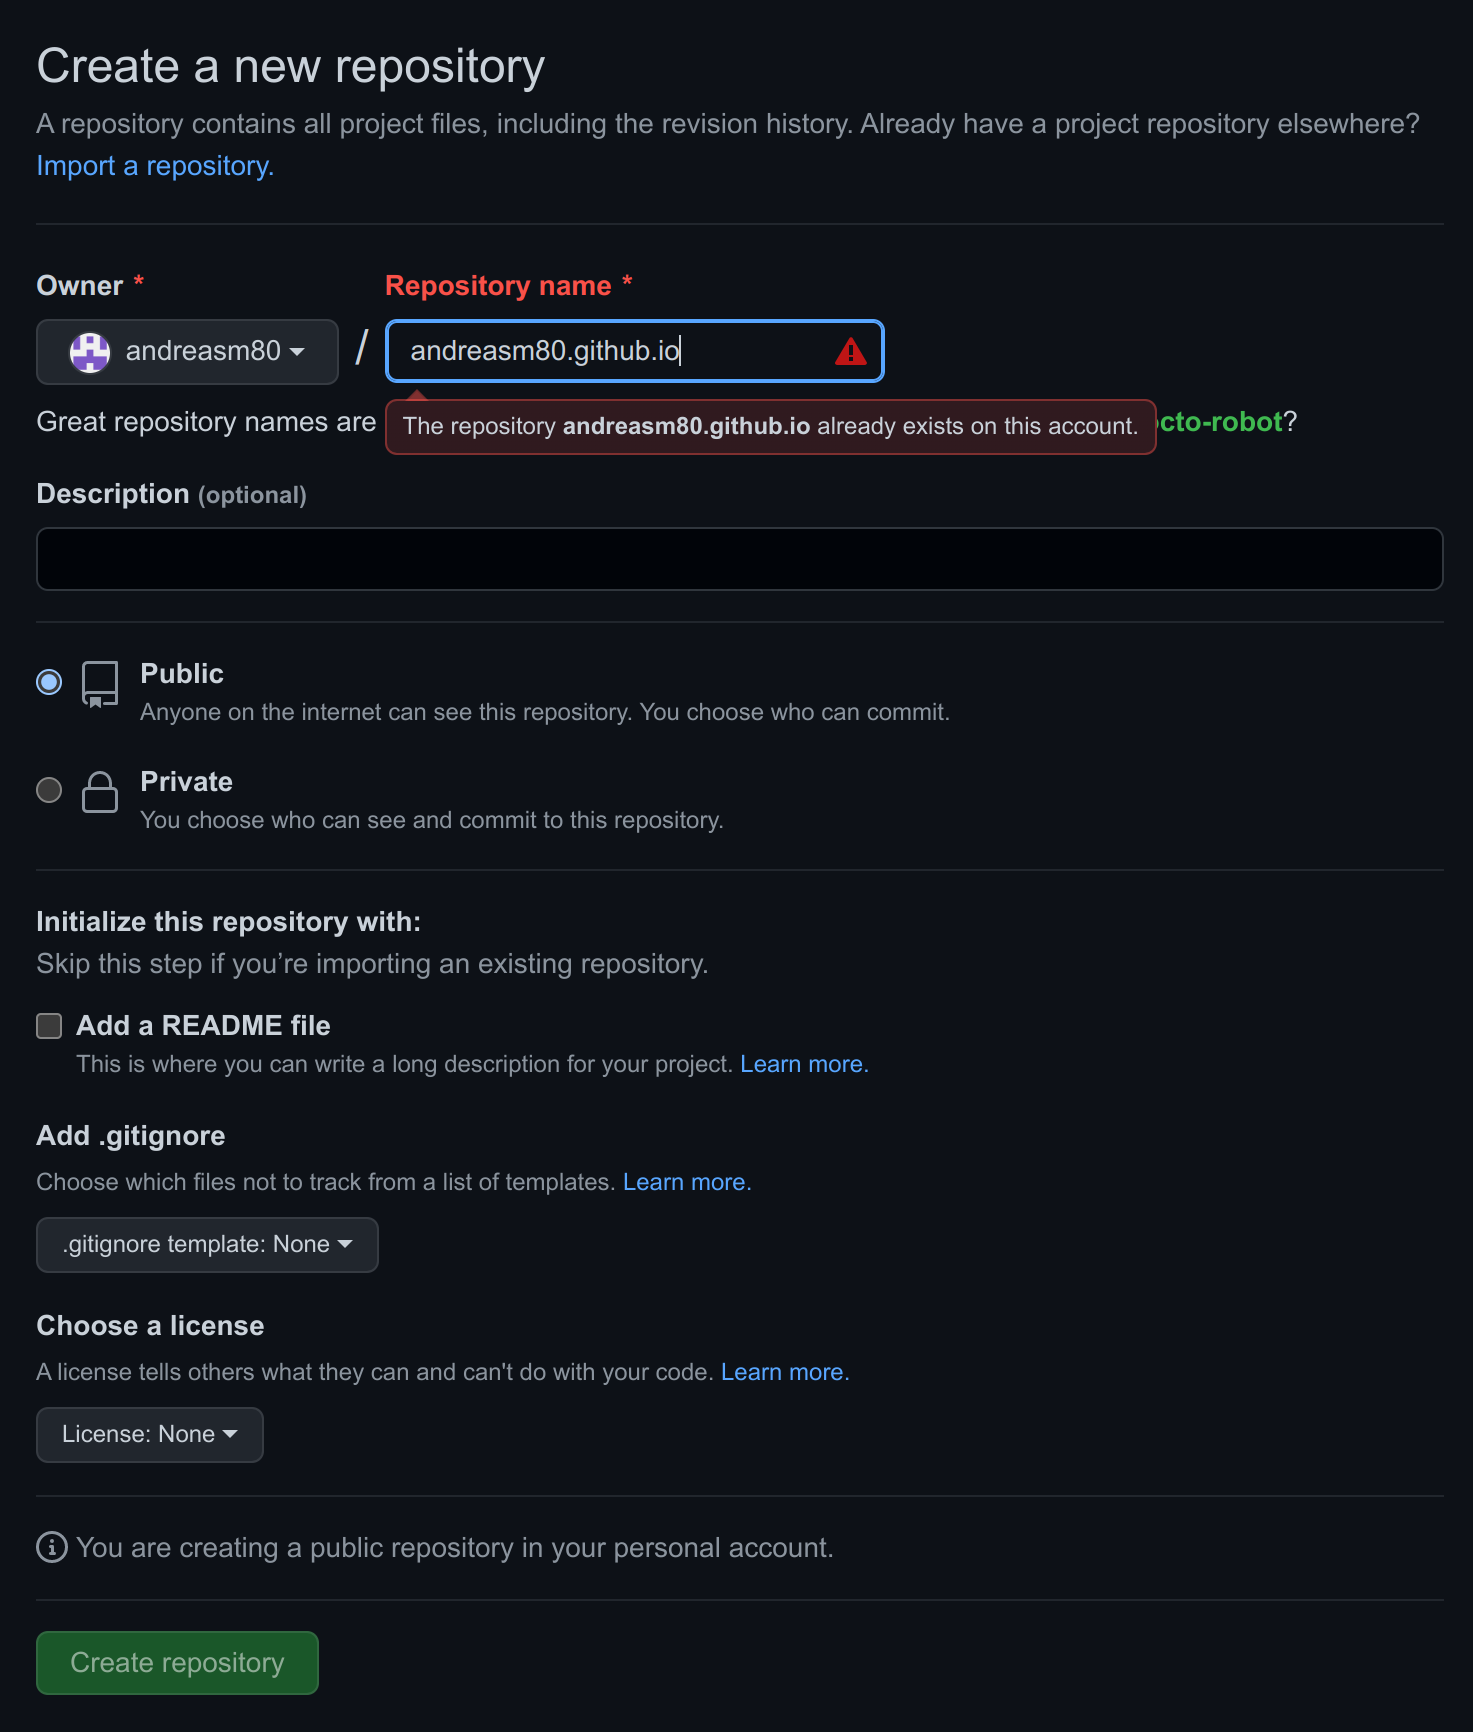
Now the second repositiory is created identically but with one important difference, the repository name. This has to start with your username and the github domain github.io (discard the red warning in example below, I already have my repository created using same name). This repository will be used to host your blog’s frontpage/webpage. This is referred to as Github Pages
Next we need to clone into our two newly created repositories.
Git #
To clone a public repo there is no need to authenticate, but you would like to create your content locally and push them to your remote git repo so we need to authenticate to our Github account. Github dont use password and username for git authentication, but instead SSH keys. And when cloning into your repo one need to use the correct way to clone it for the authentication to work. More on that later. First prepare your git environment on your workstation.
SSH keys #
On your workstation generate your SSH keys (if not already done):
ssh-keygen -t rsa -b 4096 -C "andreasm@ubuntulaptop"
Answer default to prompts, enter a desired passphrase if wanted leave empty without any passphrase.
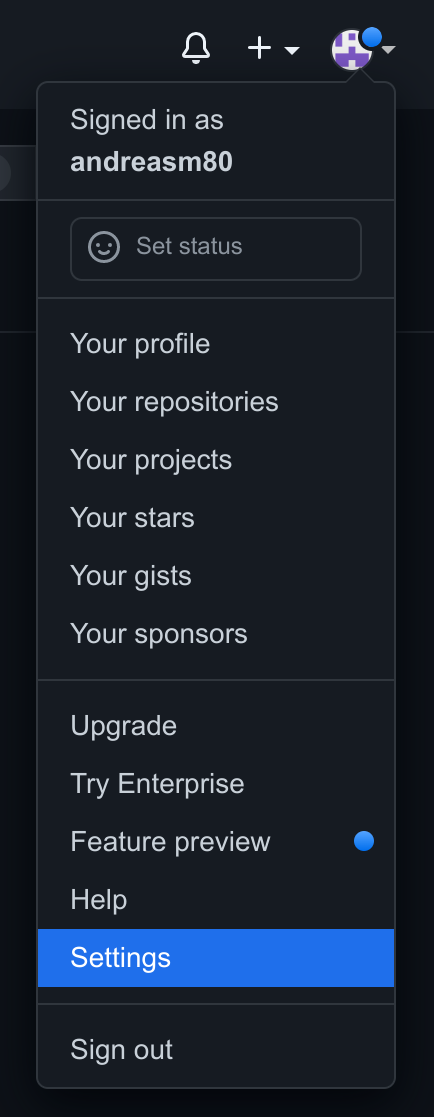
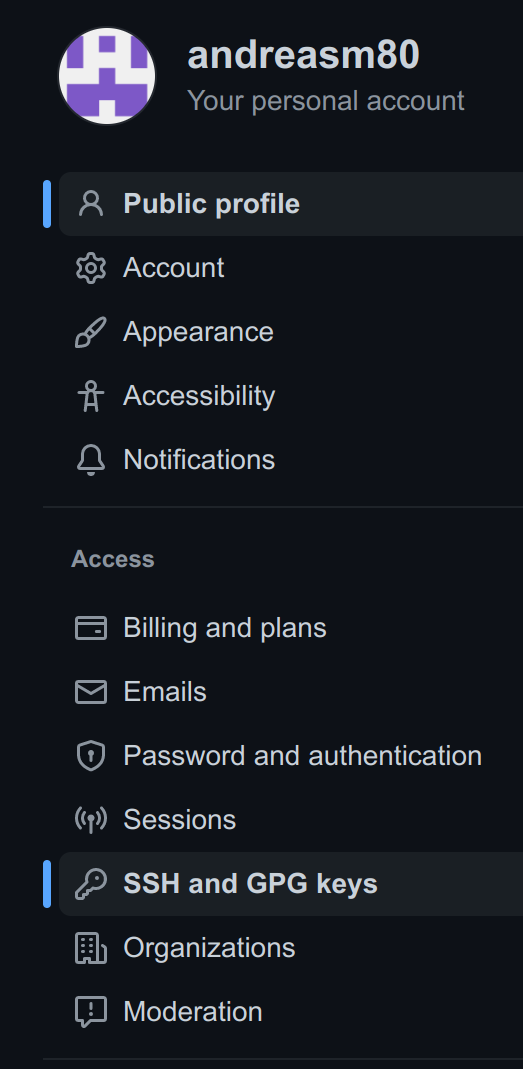
Now that the SSH keys as generated copy the content from the ~/.ssh/id_rsa.pub by issuing something like this cat ~/.ssh/id_rsa.pub and copy the wole content. Go into your Github account click on your user top right corner and -> settings
Then SSH and GPT keys:
And then New SSH Key and paste your SSH key. Give it a name.

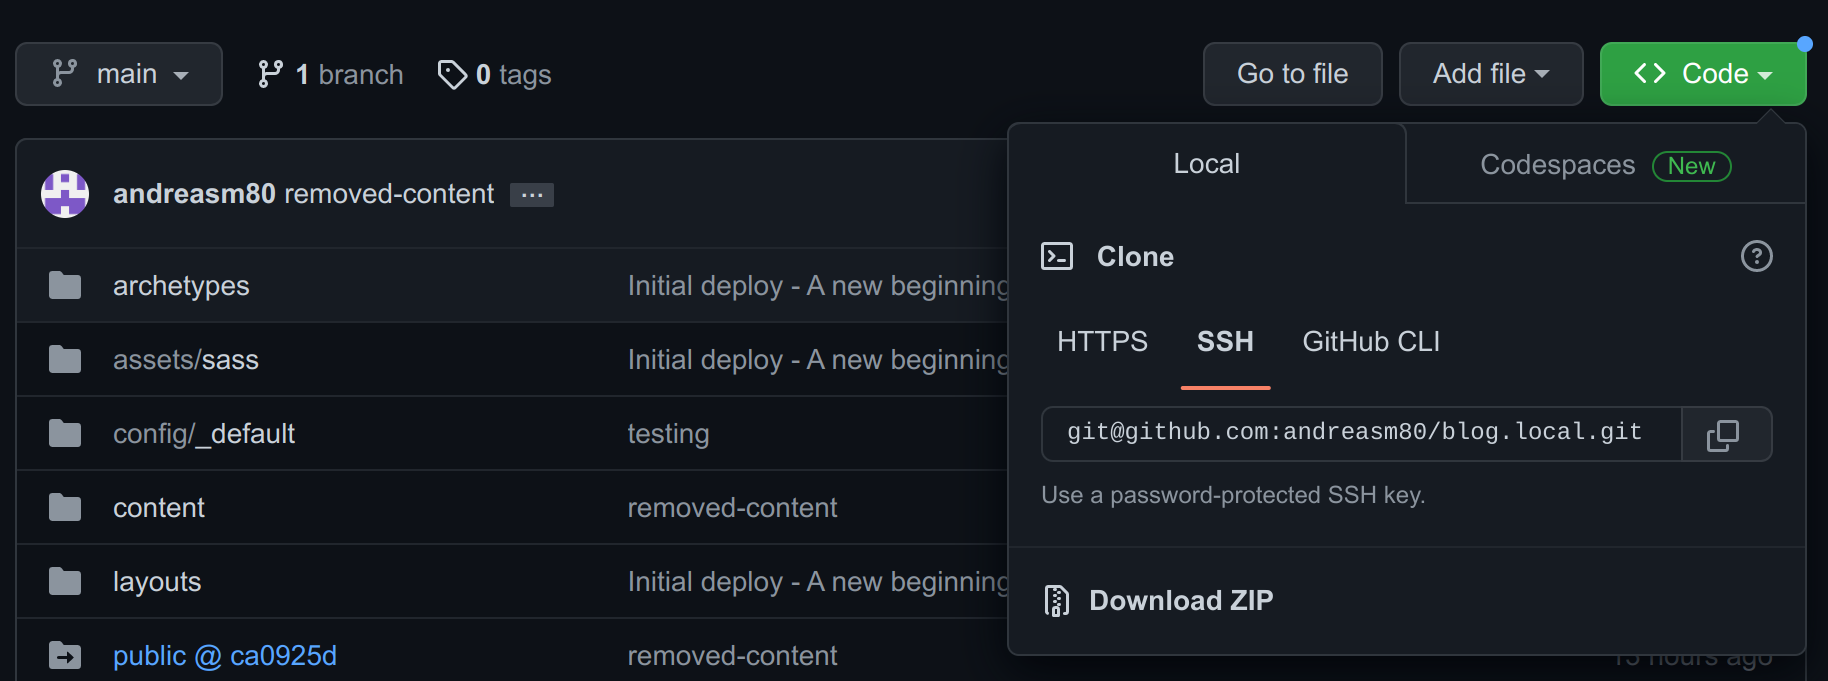
Now your Github account can authenticate your workstation by using its public SSH key. To use this approach one have to clone into a project by using git clone git@github.com:andreasm80/blog.local.git where the git@github.com:andreasm80/blog.local.git is found from your repository by clicking at the green Code on your repo:
Git - continued #
Now that the SSH keys are configured, our workstation is prepared to authenticate against our Github repositories. Create a folder in your Linux workstation, called something with github or whatever you like. Enter into that folder. Now enter the following command:
git clone git@github.com:andreasm80/blog.local.git
If you dont specify a folder at the end of the command, git will just create a folder with the same name as the repository your are cloning. If you dont want that add a folder name at the end like this:
git clone git@github.com:andreasm80/blog.local.git localfoldername
Now enter into the newly created folder: cd blog.local
To verify that you are “linked” to the correct repository run the following command:
git remote -vvv
origin	git@github.com:andreasm80/blog.local.git (fetch)
origin	git@github.com:andreasm80/blog.local.git (push)
I already have a Hugo “project” folder where I have my blog page content stored. Instead of just re-using this folder as is I copy all the content to this new folder. Then I delete the public folder (in the new folder) as this will be recreated later. Before pushing all the newly copied content into the cloned github folder above I need to do some preparation for git.
git config --global user.email "email@email.com" #is used to sign your commits
git config --global user.name "AndreasM" #is used to sign your commits - can be whatever name you want
Then I need to tell git which files it should track, commit and push when I am ready. To do this type in:
git add . #notice the "."
This means I will add all files in the folder. If you dont tell git this it will not commit and push them. You can check this with the following command:
andreasm@ubuntu:~/git status
On branch main
Your branch is up to date with 'origin/main'.

Changes not staged for commit:
  (use "git add <file>..." to update what will be committed)
  (use "git restore <file>..." to discard changes in working directory)
	modified:   public (new commits)

Untracked files:
  (use "git add <file>..." to include in what will be committed)
	content/post/2023-03-04-running-hugo-on-github/

no changes added to commit (use "git add" and/or "git commit -a")
Now you can commit by doing this command:
git commit -s -m "comment-description" # the -s is for signoff and the -m is the comment/message
And the last thing to do now is to push the files locally to your remote github repository.
git push
If you go into your Github page now you will see all your files there in the repo above, but still there is no working blog-page yet.
Git submodules #
As explained above, we need to create some kind of “softlink” for the folder public to point to the repository we will use as our web-page. In git we can use submodules for that. The reason for that is each time you generate your Hugo content, Hugo will create a public folder which contains the actual HTML files. And instead of copying the content of this folder each time you generate your webpage we link this folder to our Github Page repository. This is how to enable git submodules.
While still in your blog.local folder (root of the first repository) enter the following:
git submodule add git@github.com:andreasm80/andreasm80.github.io.git public/ #the url is from my second repo being used for Github Pages
With the above command I am instructing git to create a submodule point to my remote Github repository I will use as my Github Page and also pointing it to the local folder public.
Then the next command is to initialize the submodule:
git submodule init
#or a specific module as below
git submodule init public/
In the current folder we should have file called .gitmodules have a look inside and it should contain something like this:
[submodule "public"]
        path = public
        url = git@github.com:andreasm80/andreasm80.github.io.git
This is how my folder structure looks like now:
github/blog.local
archetypes
assets
config
content
.git
.gitmodules
go.mod
go.sum
.hugo_build.lock
layouts
LICENSE
public #this folder was created by the git submodules command
README.md
resources
static
Check the status on the submodule you have created:
git submodule status
+6afb3af12e86416ad8ff255d9042d89bd9ddc719 public (heads/master) # status symbols infront, sha, name of submodule and branch
Commit the changes we have done so far in our blog.local repo:
git add .
git commit -s -m "added submodule public"
git push
Head over to your Github blog.local repo and you should see that the public folder is quite different from the others:

And if you click on it you will be redirected to the repository of your second repository used for your Github Page.
Now back to the CLI terminal…
To have something to populate the public folder with we can now run the `hugo -v -D’ command to generate our webpage. It will write everything needed in our public folder.
hugo -v -D
Now cd into the public folder. Check the repo it is pointing to:
git remote -vvv
origin	git@github.com:andreasm80/andreasm80.github.io.git (fetch)
origin	git@github.com:andreasm80/andreasm80.github.io.git (push)
Check if there is something new or untracked here:
git status
Untracked files:
  (use "git add <file>..." to include in what will be committed)
	2023/03/04/hosting-my-blog-on-github/
	tags/static-site-generator/

no changes added to commit (use "git add" and/or "git commit -a")
Run the following commands:
git add .
Changes to be committed:
  (use "git restore --staged <file>..." to unstage)
	new file:   content/post/2023-03-04-running-hugo-on-github/images/GitHub-Logo300px.png
	new file:   content/post/2023-03-04-running-hugo-on-github/images/image-20230305091118809.png
	new file:   content/post/2023-03-04-running-hugo-on-github/images/image-20230305091558280.png
	new file:   content/post/2023-03-04-running-hugo-on-github/images/image-20230305092142364.png
	new file:   content/post/2023-03-04-running-hugo-on-github/images/image-20230305094906285.png
	new file:   content/post/2023-03-04-running-hugo-on-github/images/image-20230305100514339.png
	new file:   content/post/2023-03-04-running-hugo-on-github/images/image-20230305100657366.png
	new file:   content/post/2023-03-04-running-hugo-on-github/images/image-20230305100847587.png
	new file:   content/post/2023-03-04-running-hugo-on-github/images/image-20230305101357702.png
	new file:   content/post/2023-03-04-running-hugo-on-github/images/image-20230305112013507.png
	new file:   content/post/2023-03-04-running-hugo-on-github/images/image-20230305112521903.png
	new file:   content/post/2023-03-04-running-hugo-on-github/images/image-20230305113016848.png
	new file:   content/post/2023-03-04-running-hugo-on-github/images/image-20230305113102660.png
	new file:   content/post/2023-03-04-running-hugo-on-github/index.md
	modified:   public


git commit -s -m "added content"
git push
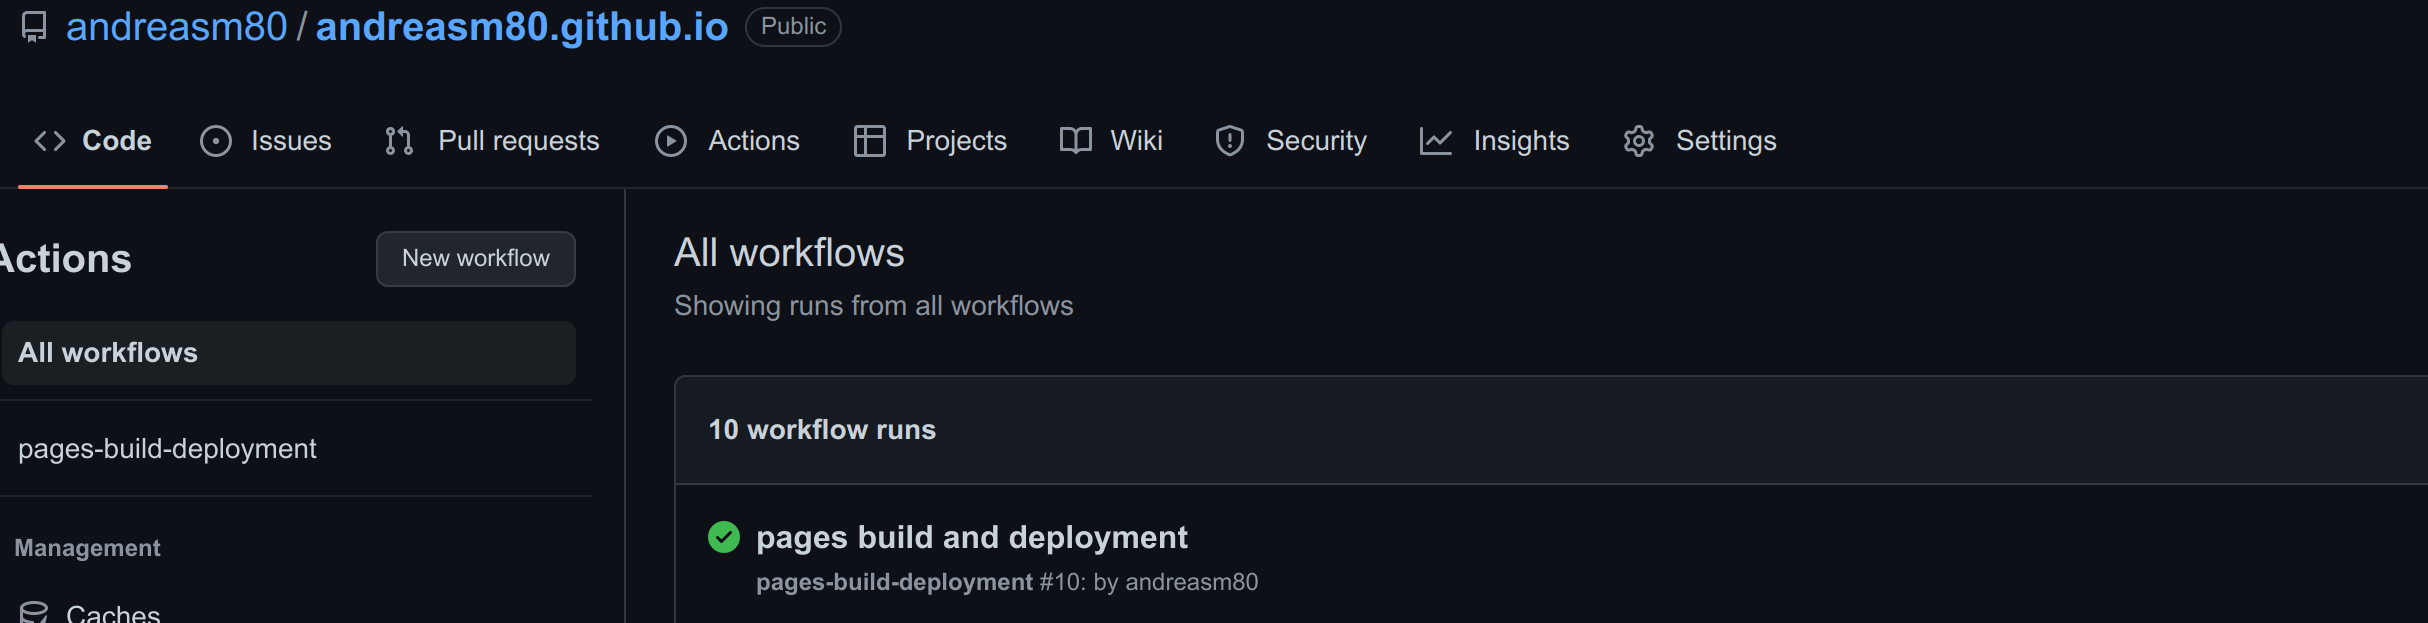
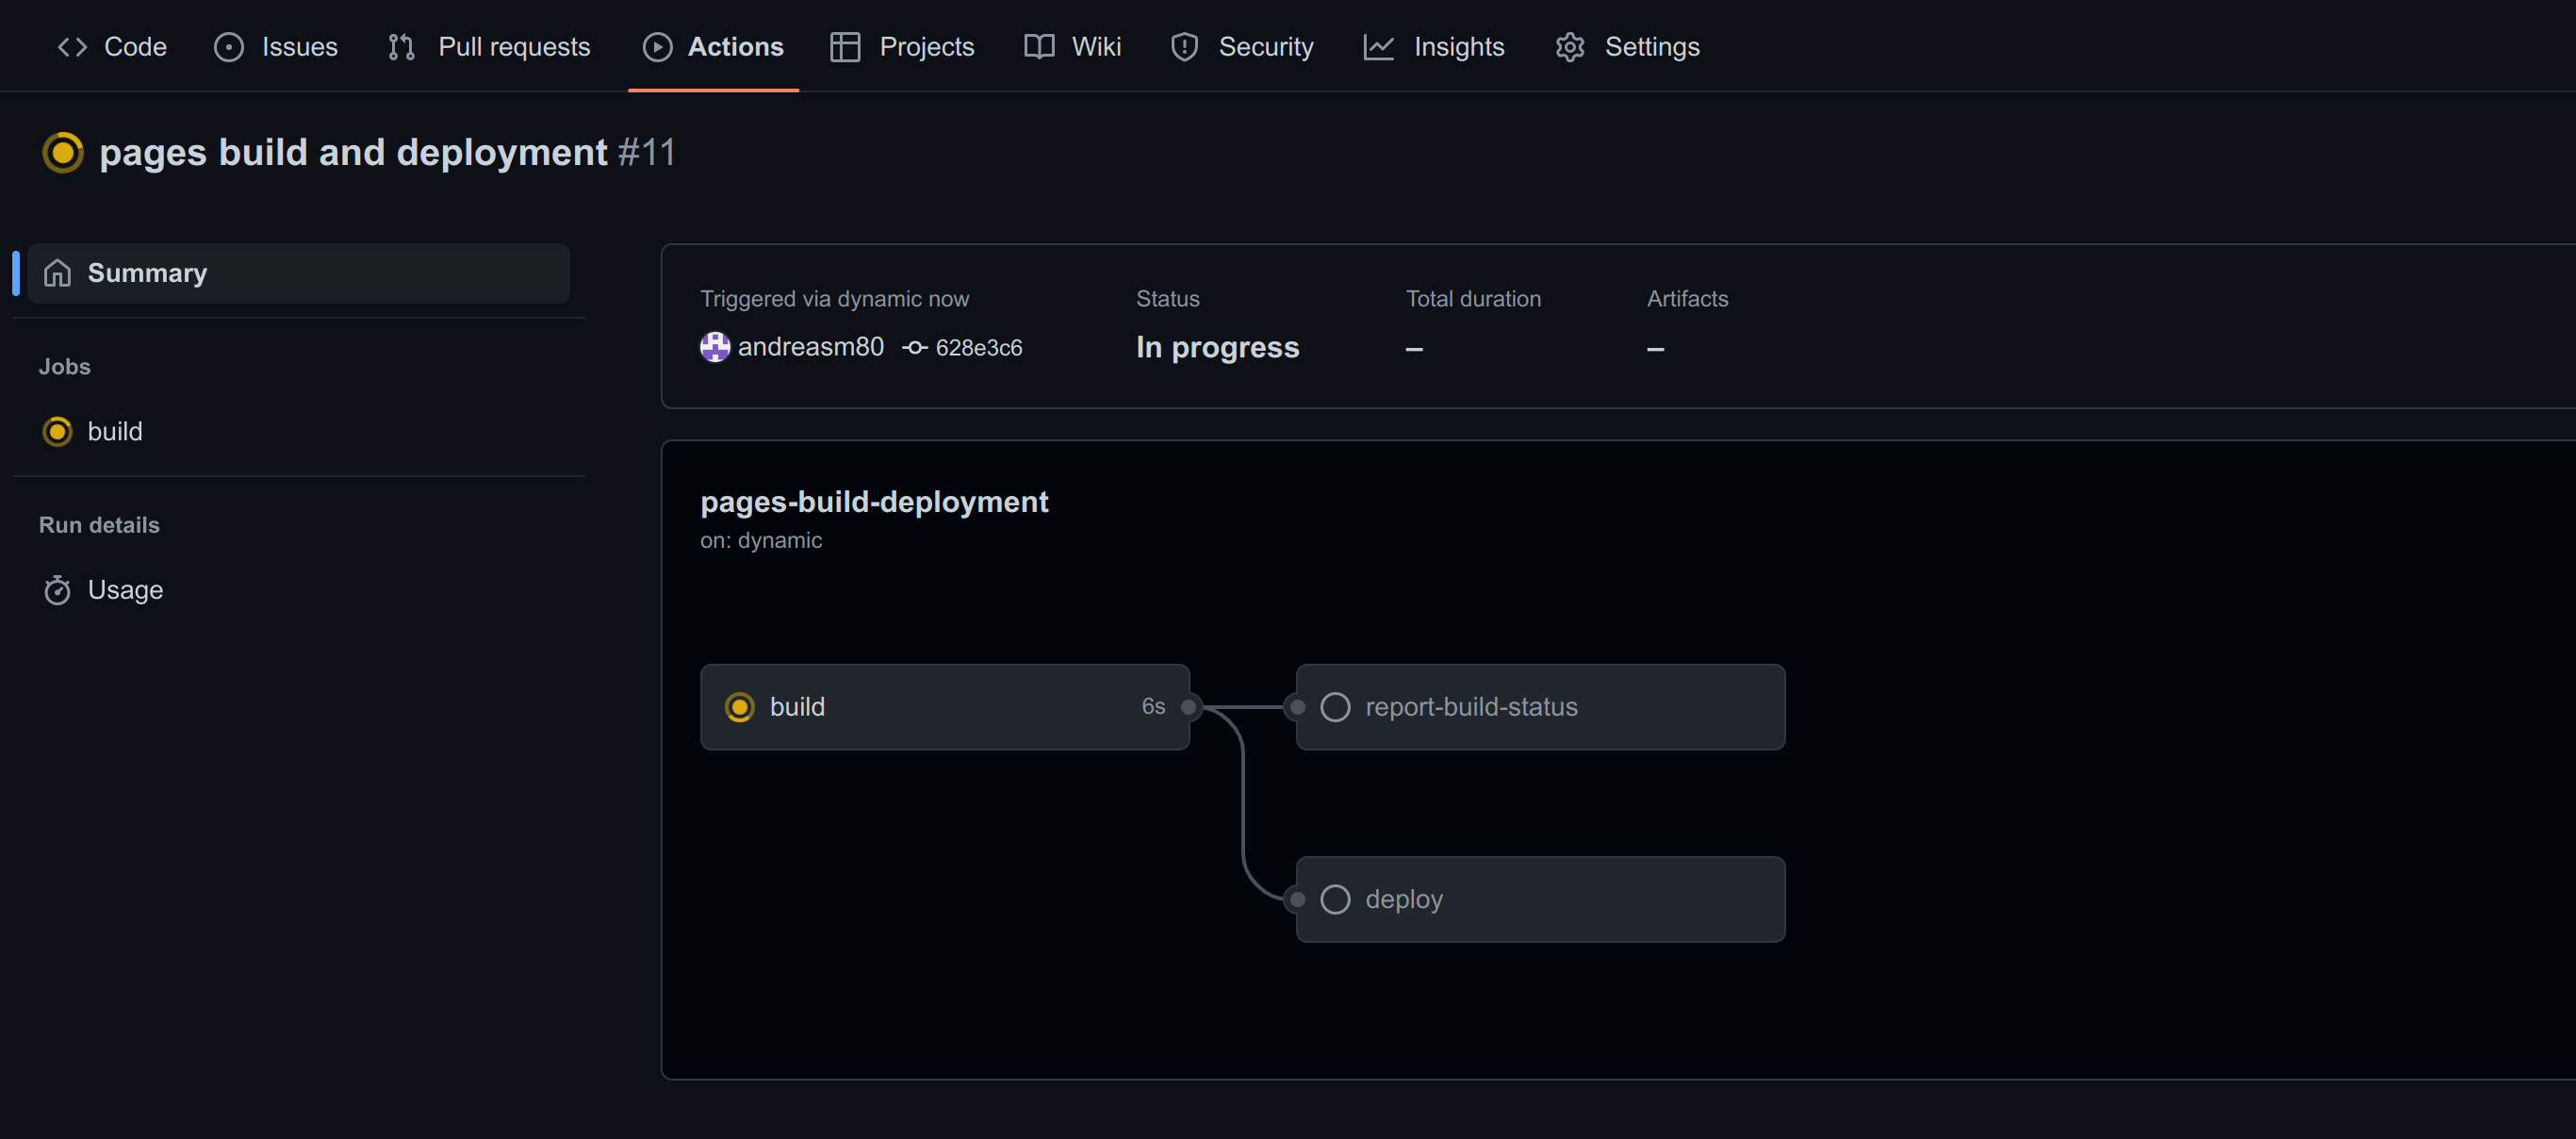
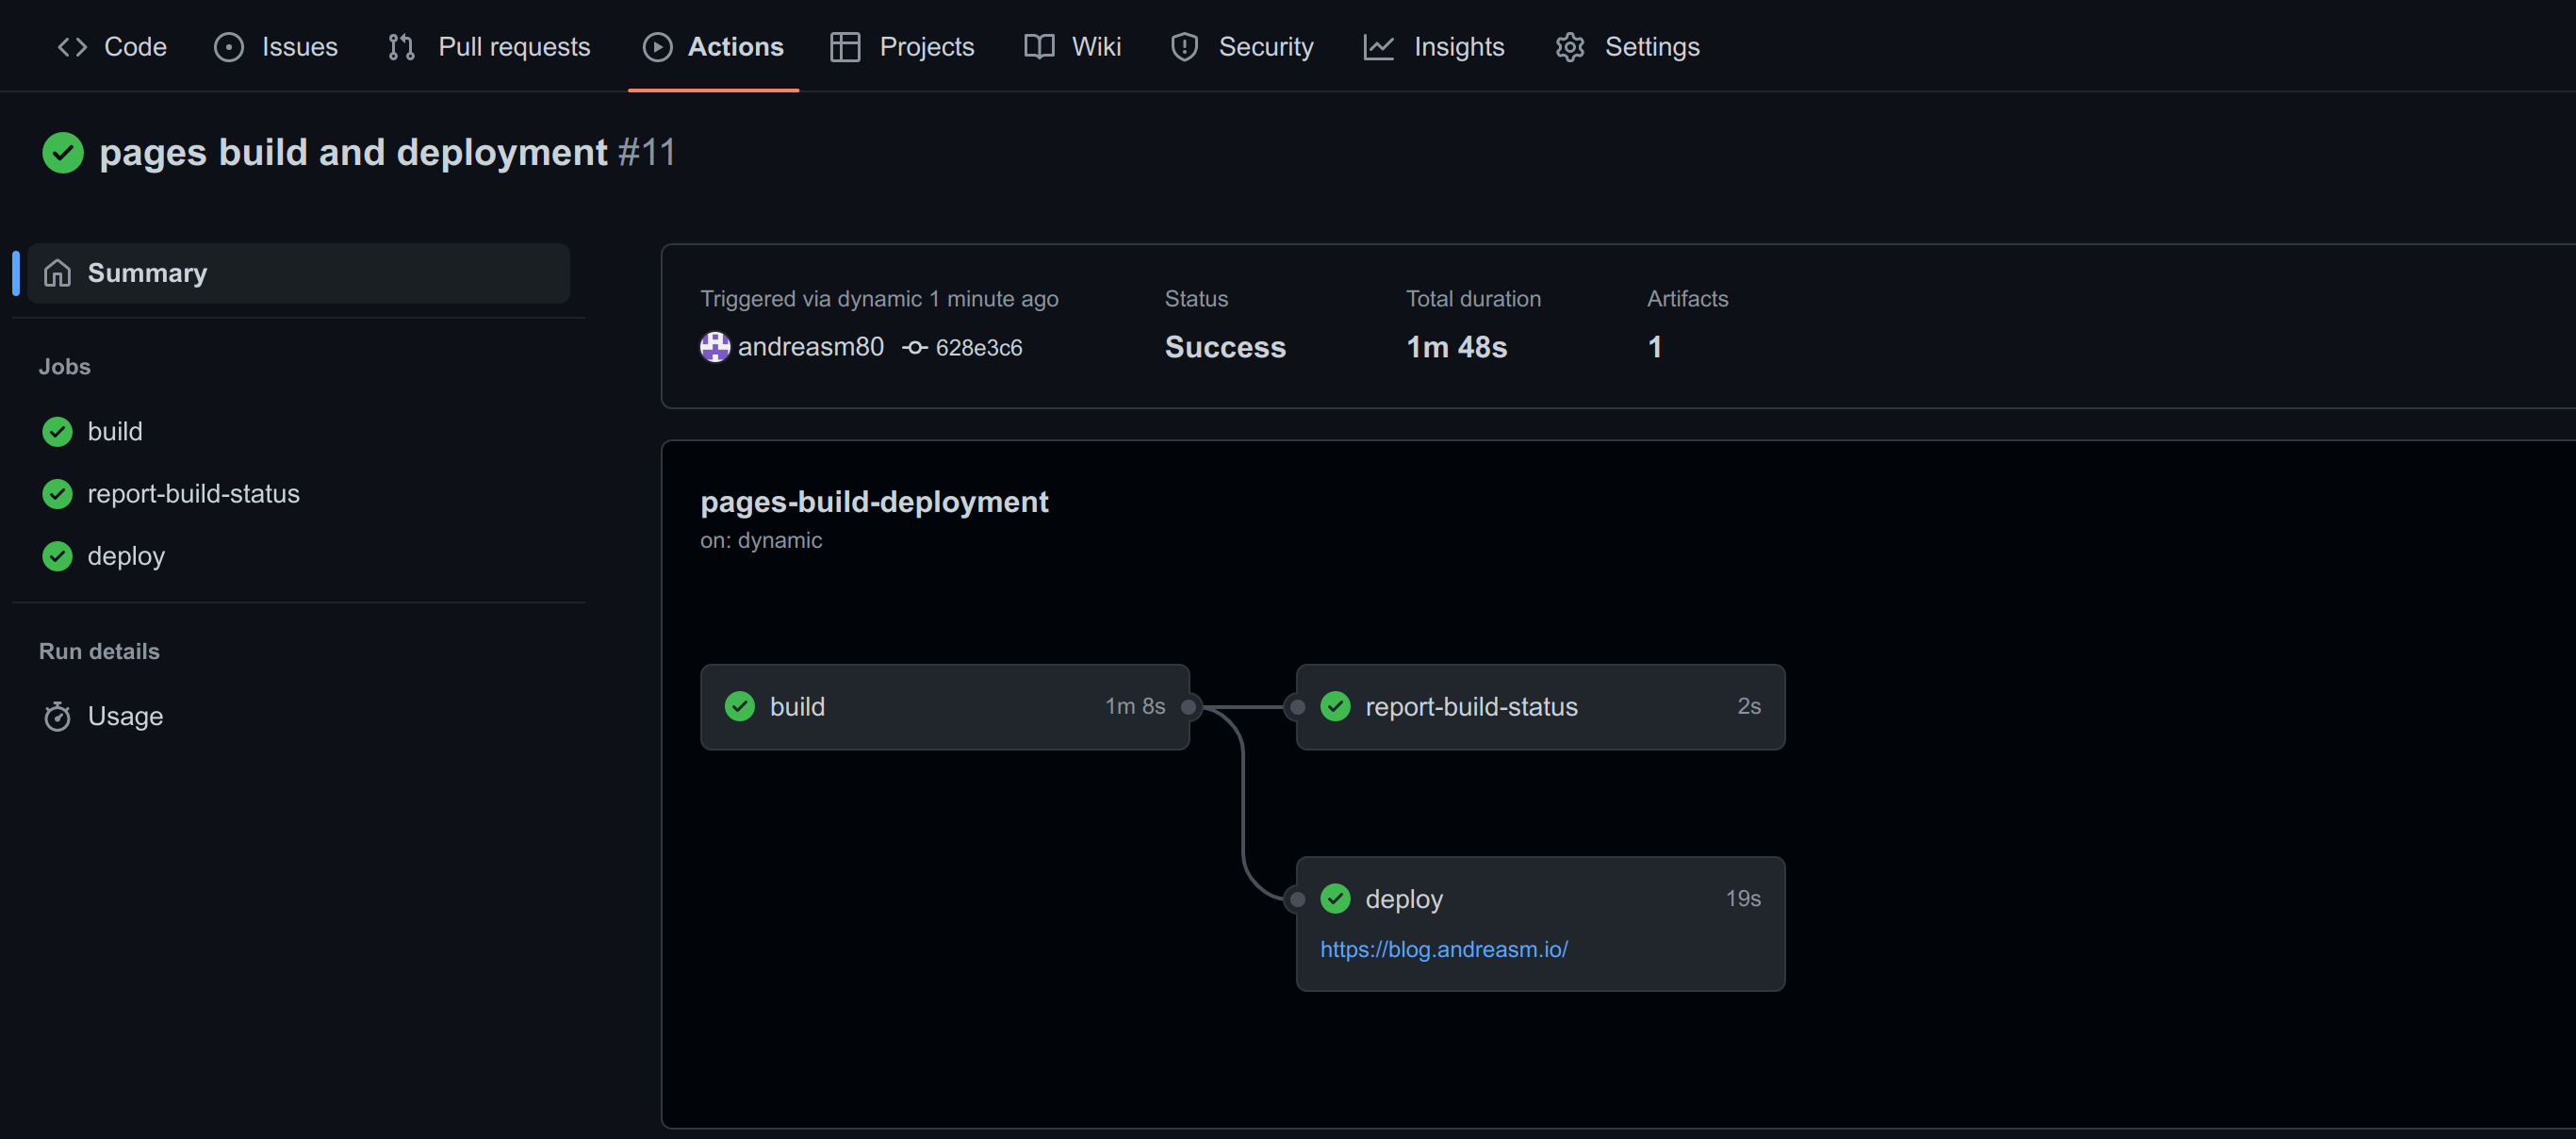
Now Github should start build your blog-page. This can be seen under Actions here:
Updating my blog with this content:
For backup reasons it could also be smart to commit and push the blog.local folder also.
Go back one level (from public to blog.local folder, root)
git status
git add .
git commit -s -m "added-content"
git push
New machine - set up environment #
If you need to start from scratch, you have a new machine or whatever you dont have to go through all the steps above, you only need to add the SSH key, creating the git config -global settings. After that It is just as simple as doing this:
git clone --recurse-submodules git@github.com:andreasm80/blog.local.git #this will also clone submodules
# then it is just regular git commands:
git add .
git commit -s -m "message"
git push
Custom domain - Github Pages #
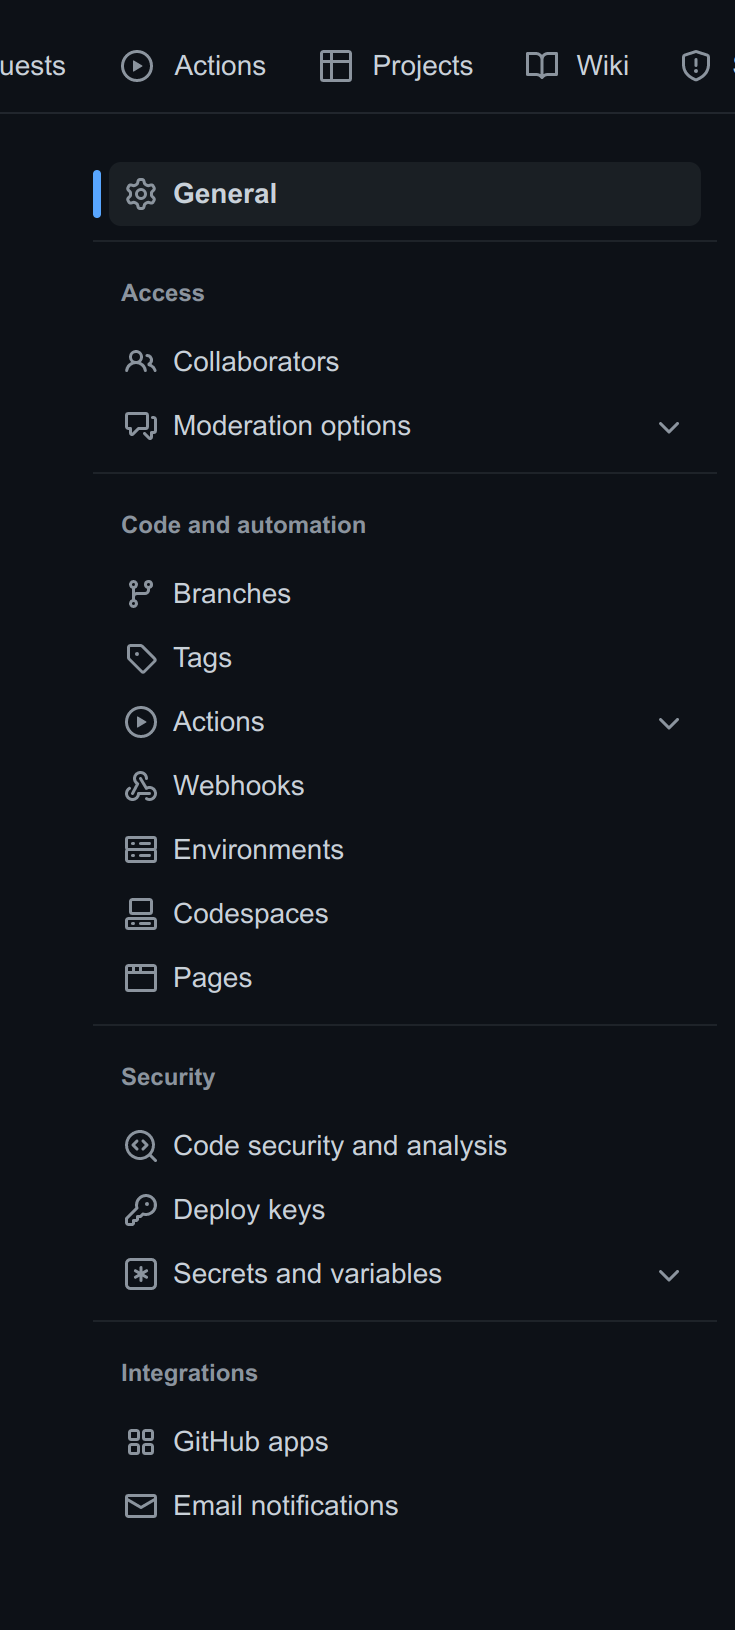
If you would like to present your Github Page (aka blog page) on a different domain you happen to own head over to settings in your Github Pages repository:

The on the left side click on Pages
And in Pages type in your custom domain here and enable Enforce HTTPS:
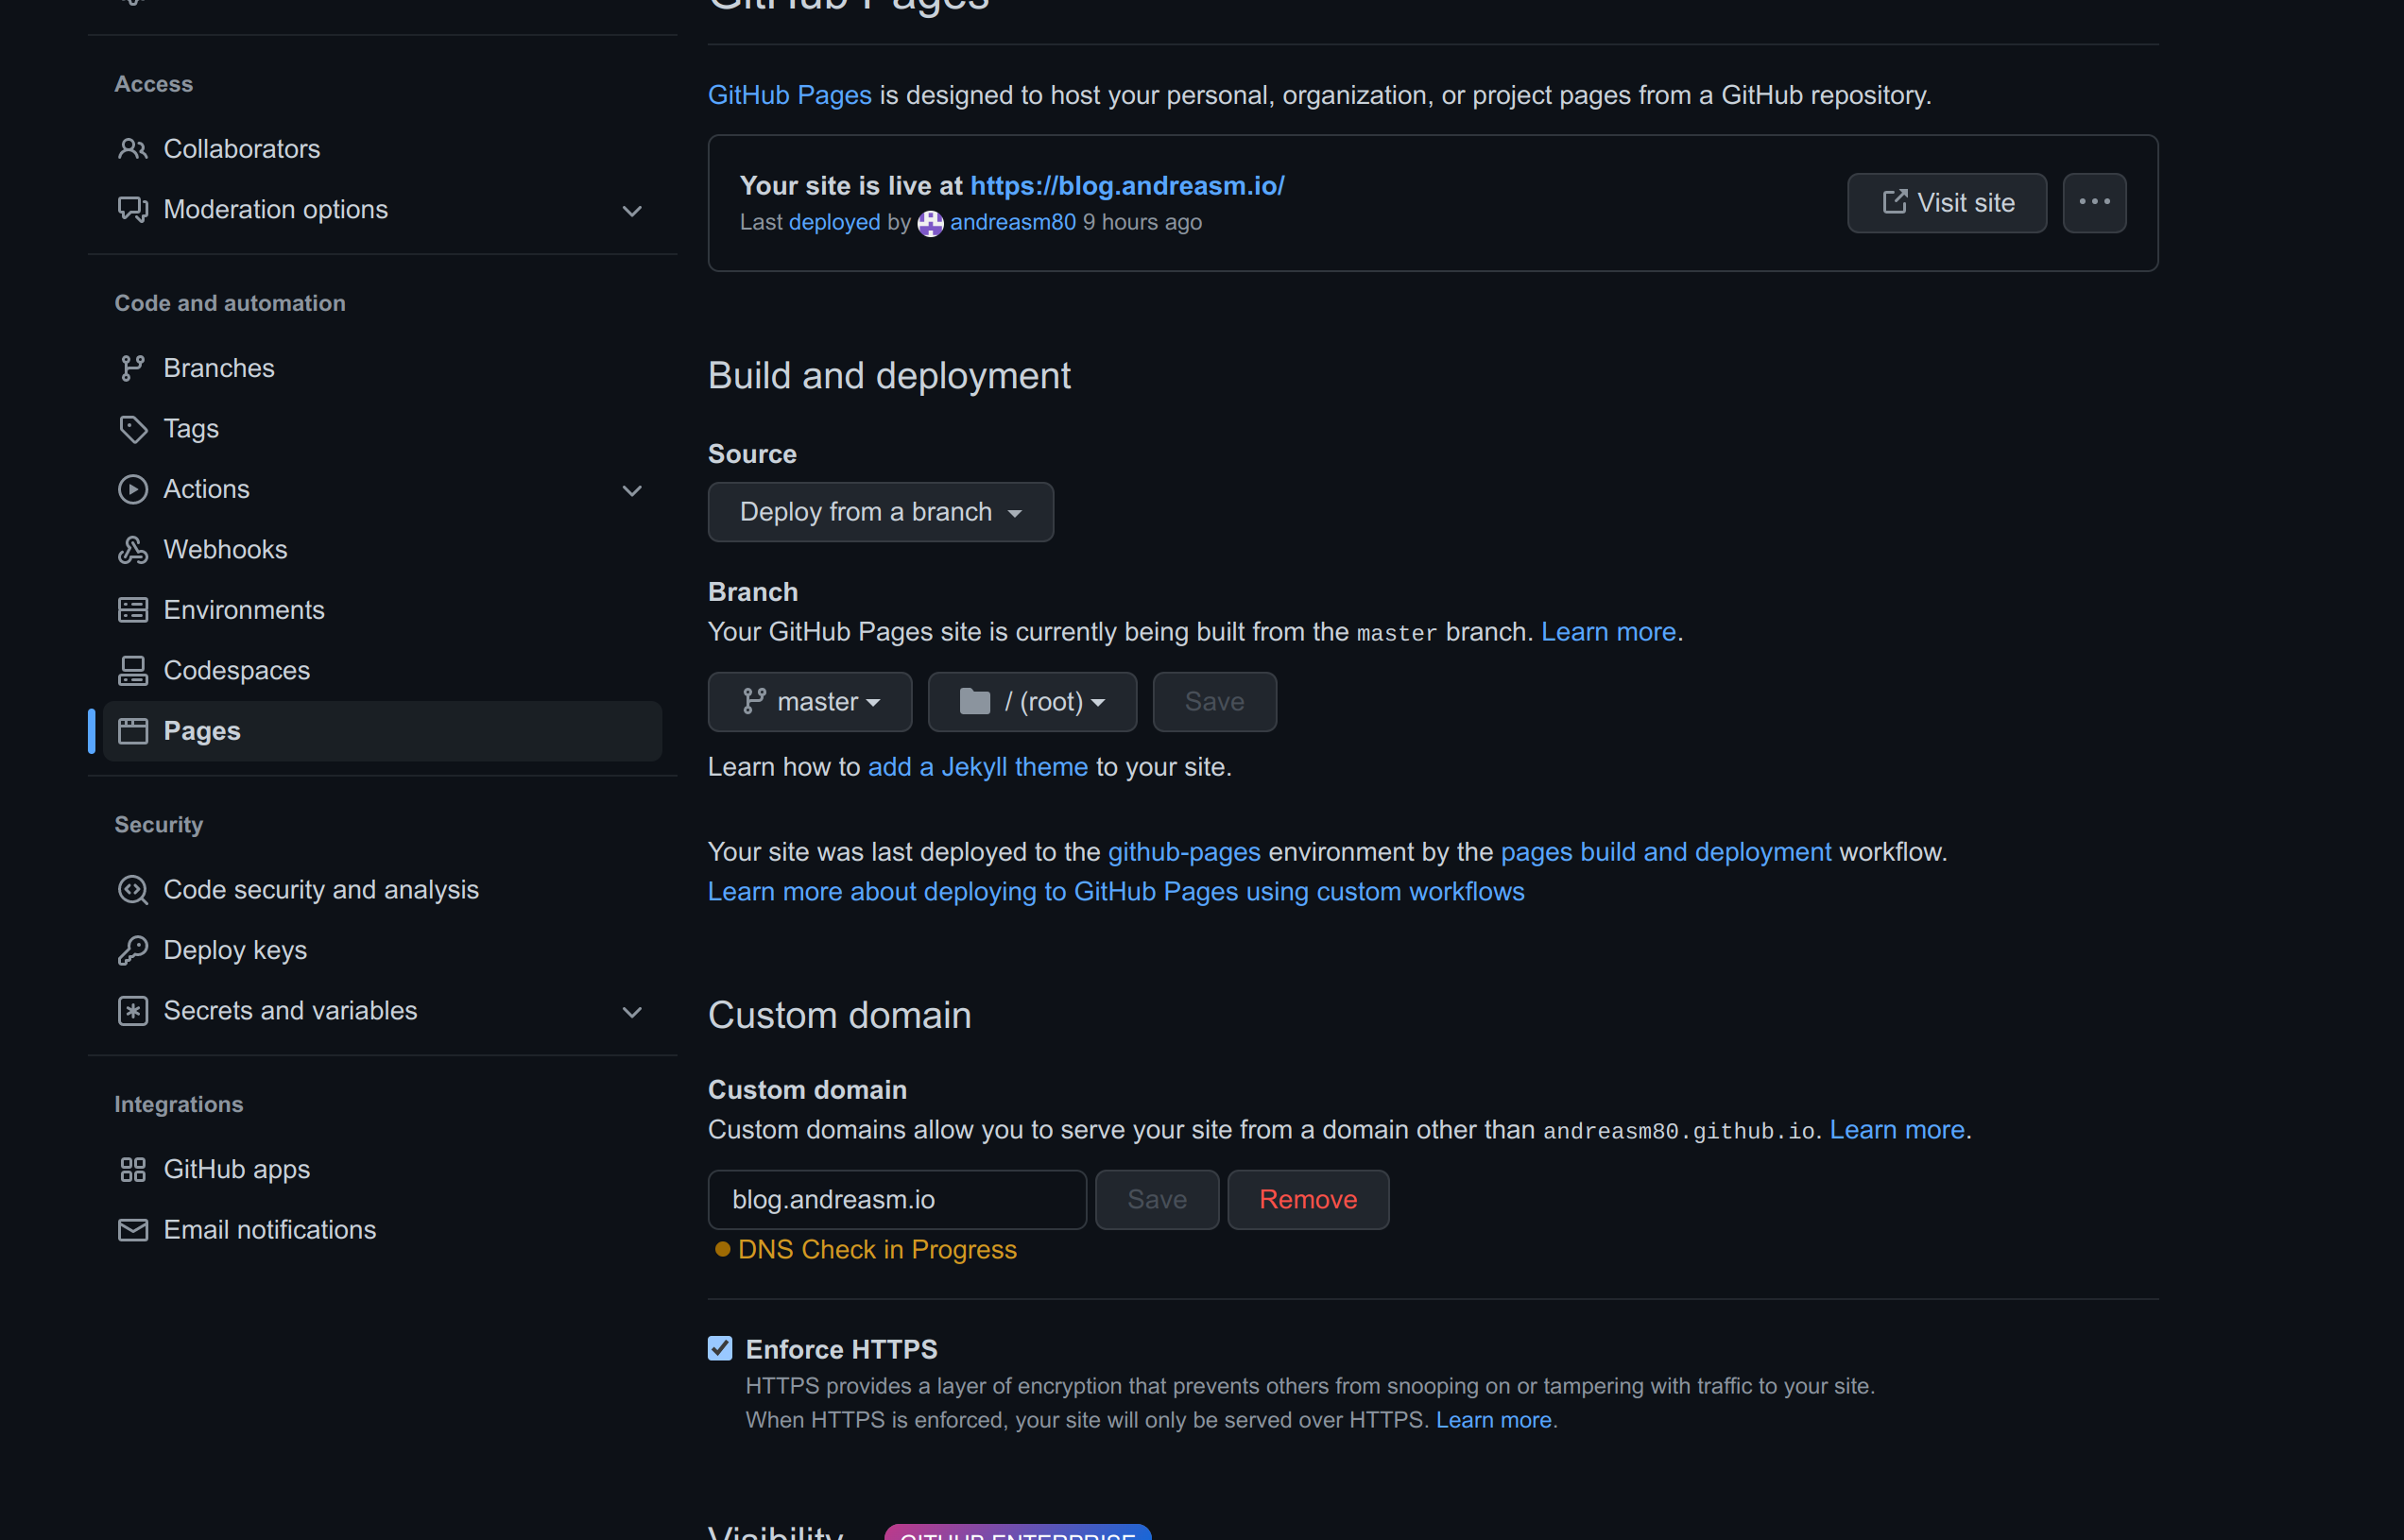
When you click save Github will place a file called CNAME in the root of your Github pages repository (mine andreasm80.github.io) where the content is the dns record you have entered in the Custom Domain field above. So you would need to fetch this locally with git to be in sync again.
# you can either enter your submodule(s) directory and run:
git fetch
# or you can stay in the "root" folder and enter:
git submodule foreach 'git fetch'
#which will do a fetch on all submodules
Now you need to go to your DNS provider and add a CNAME pointing to your Gitub pages repository name, in my case that is andreasm80.github.io. So I have created this cname record:

Github will manage the certificate for your Github Page, so you dont have to worry about that either. After some minutes/hours (depending on how fast DNS is updated) your blog page will be resolved on the custom domain. Mine is https://blog.andreasm.io